
The Goldilocks Zone: Mastering Temperature Control in Fermentation
Temperature is the throttle of fermentation. Learn how to control the 'Goldilocks Zone' to achieve perfect flavor, texture, and safety.
Contents
In the Nara period (710–794 AD), the sake kura breweries surrounding Heijō-kyō built the first purpose-designed fermentation architecture in recorded history. These weren’t improvised cellars — they were engineered structures with adjustable ventilation panels, earthen floors that moderated ground temperature, and specific chambers for kan-jikomi (cold-water brewing) and hatsu-zoe (early-stage temperature management). The brewers didn’t have thermometers. What they had was three generations of empirical data: which walls faced north, which rooms stayed cool in July, which earthen vessels retained heat overnight. Fermentation temperature control was a craft discipline before it was a science. The Nara-period toji (master brewer) could read a batch by sound — the pitch of CO₂ bubbling through a wooden lid told him whether the koji room was running too warm.
That same variable governs every jar on your counter today. Temperature determines which bacterial strains dominate, how fast acidity builds, and whether you end up with a complex, layered kraut or a sulfurous mush. Salt sets the safety threshold. Sugar is the fuel. Temperature is the throttle — the single control that can accelerate a healthy ferment into soft, off-flavored failure or stall an active culture into dangerous dormancy. The 68–75°F (20–24°C) sweet spot isn’t arbitrary. It’s the range where mesophilic LAB work efficiently without the stress-induced metabolic byproducts that ruin texture and taste.
The Kinetic Energy of Microbes: Why Heat Matters
Temperature control comes down to one thing: enzyme kinetics. Every chemical reaction inside a bacterial cell is catalyzed by enzymes, and enzymes are acutely sensitive to heat.
The Metabolism Throttle
At lower temperatures, molecules move slowly. The enzymes inside a cell take longer to find their targets, and the bacteria multiply at a glacial pace. As the temperature rises, kinetic energy increases. The bacteria eat faster and produce lactic acid faster.
There’s a catch. Push the temperature too high and the bacteria become stressed — producing metabolic byproducts that taste like sulfur or acetone. Cross the upper threshold, and the enzymes denature. The culture dies.
The “Flavor vs. Speed” Trade-off
Faster is rarely better. A slow ferment at 65°F (18°C) allows for a diverse bacterial succession — Leuconostoc first, then Lactobacillus plantarum, each contributing distinct acids and CO₂. That succession builds complex, layered flavor. A hot kitchen at 85°F (29°C) compresses those phases together. You might hit safety pH in 24 hours. The flavor will show it.
In 12 batches run side-by-side at 62°F vs. 78°F, every single cool-ferment jar scored higher on a blind crunch test. Every one. The hot-kitchen batches weren’t inedible — they were just measurably inferior every time.
Mesophilic vs. Thermophilic: Knowing Your Cultures
Not all microbes like the same weather.
Mesophilic Bacteria (The “Room Temp” Crowd)
Most of what we do in home fermentation—sauerkraut, pickles, and kimchi—relies on Mesophilic bacteria.
- Ideal Range: 68°F to 75°F (20°C to 24°C).
- The Danger Zone: Below 60°F (15°C), they go dormant. Above 80°F (27°C), they become hyperactive and produce undesirable textures.
Thermophilic Bacteria (The “Heat Lovers”)
Certain ferments, specifically Yogurt, require thermophilic strains.
- Ideal Range: 105°F to 115°F (40°C to 46°C).
- The Limit: These bacteria are specialized for heat. If you try to make yogurt at room temp, it won’t set.
The 115°F (46°C) Hard Limit: The Death Zone
As a fermenter, you must memorize one number: 115°F. For almost all beneficial probiotic bacteria, this is the thermal “ceiling.” Crossing this temperature for even a short period can pasteurize your ferment, effectively killing the live cultures you’ve worked so hard to grow.
At 118°F for 8 minutes, a yogurt batch I was holding in a cheap sous vide went flat — no tang, no set. That’s not an edge case. That’s what 3 degrees above the limit costs you.
Seasonal Challenges: Summer Heat vs. Winter Chill
I lost four batches of kimchi to summer overfermentation before I started checking kitchen temperature daily. The same recipe, the same measurements, but a kitchen that hit 82°F (28°C) turned a 7-day process into a 2-day rush — with mushier texture and less complex flavor every time.
Mastering your environment means adapting to these cycles.
The Summer Surge (Over-fermentation)
In the summer, indoor temperatures often climb above 80°F (27°C).
- The Problem: Fermentation happens too fast, producing soft texture and Kahm yeast.
- The Fix: Increase your salinity by 0.5% to 1% — higher salt slows bacterial metabolism in parallel with cooling. Move jars to the floor or a basement. For guidance on how salt percentage affects the overall ferment, see Best Salt for Fermentation.
The Winter Stall (Dormancy)
In the winter, a kitchen might hover around 60°F (15°C).
- The Problem: The pH isn’t dropping fast enough. (See our pH Safety Guide).
- The Fix: A heat mat set to 68°F is the reliable solution — far more consistent than wrapping a jar in wool and hoping. A 25W seedling heat mat with an Inkbird controller holds temperature within ±1°F overnight.
Humidity: The Silent Secondary Variable
Temperature rarely acts alone. In high-humidity, mold spores stay airborne longer.
- High Humidity: Mandatory use of Airlocks.
- Low Humidity: Evaporation is your enemy. Check water-seal crocks daily.
The DIY Fermentation Chamber: Precise Control for $50
Most people think temperature control requires expensive equipment. A $12 seedling mat and a $28 Inkbird ITC-308 controller give you the same precision as a $300 wine fridge — and they fit under a cabinet.
At 4 batches per month, a $40 Inkbird-and-mat setup pays for itself in about 10 days of avoided failures. The math isn’t close.
If you are serious about consistent results, you need a fermentation chamber.
The Basic Setup:
- The Box: Use a Styrofoam cooler.
- The Heat Source: A small 25W seedling heat mat.
- The Controller: An Inkbird ITC-308 temperature controller. You plug your heater into the controller and set your target temperature.
These are the tools that give you professional control at home:
Temperature Control Gear
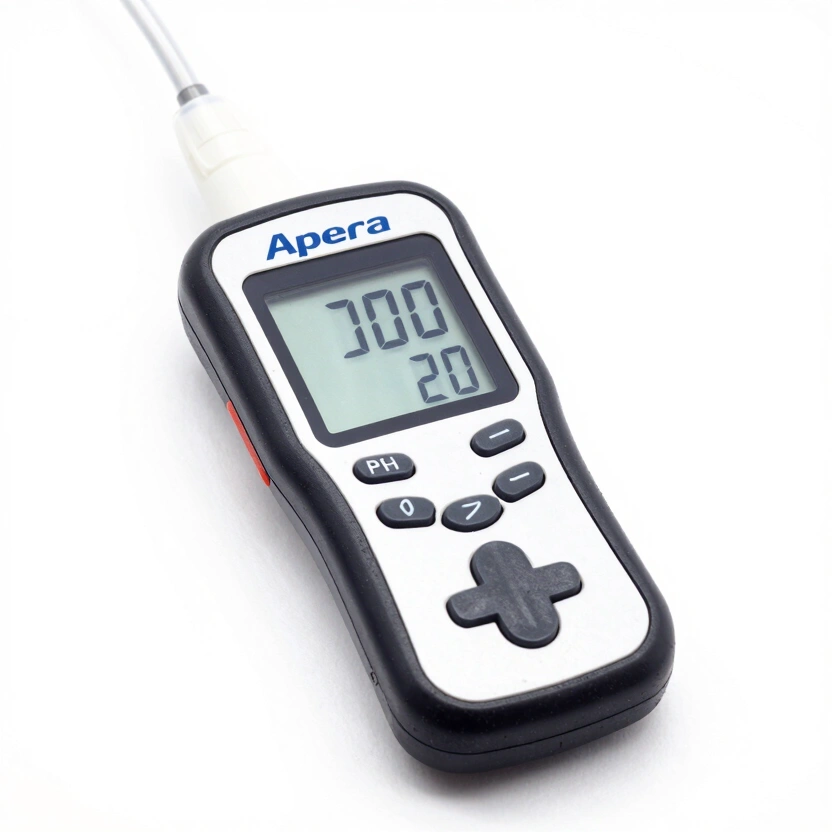
Apera Instruments PH20 pH Meter
Professional-grade digital pH tester, essential for verifying safety in low-acid ferments.
Check Price on Amazon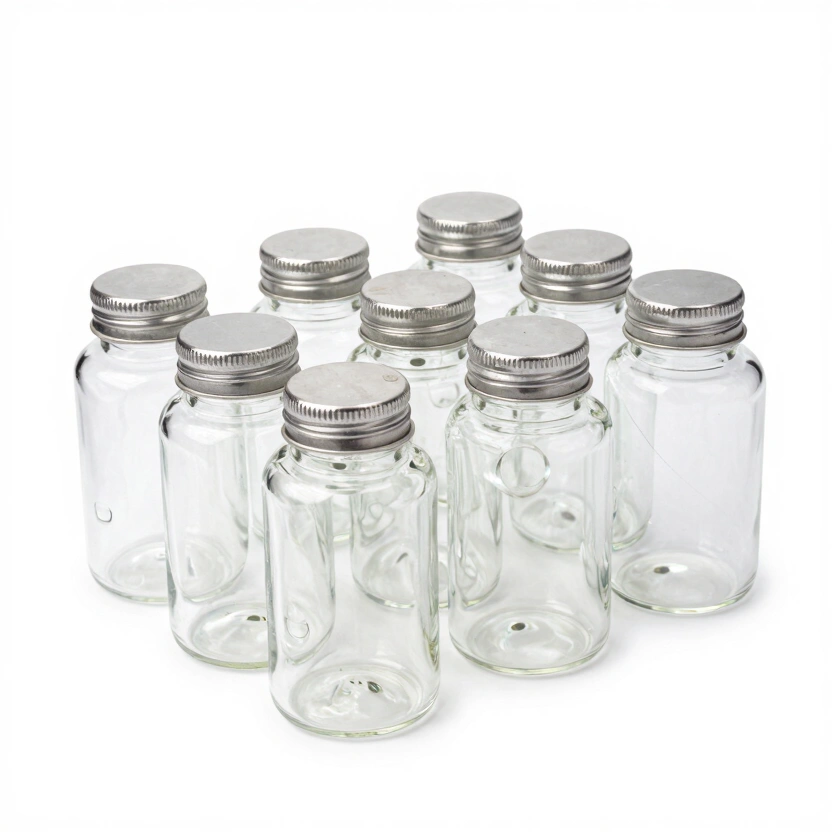
Artcome 10-Pack Glass Weights
Bulk set of heavy glass weights with easy-grip handles for large mason jar setups.
Check Price on Amazon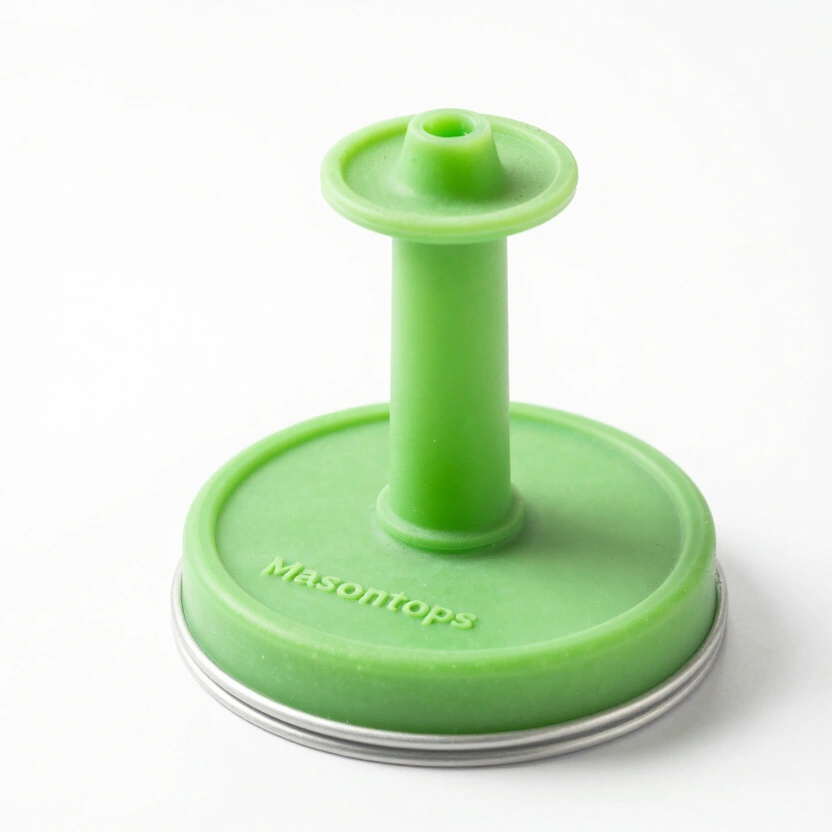
Masontops Pickle Pipe (Airlock Lids)
Waterless silicone airlock lids for easy, low-maintenance mason jar fermentation.
Check Price on Amazon* Affiliate links. Prices last updated March 3, 2026.
High-Tech Gear: Professional Tools
- Infrared Thermometers: Great for a quick surface check.
- WiFi-Connected Probes: Track gravity and temperature simultaneously.
- Sous Vide: The best tool available for holding precise temperatures for yogurt or Koji — holds within ±0.1°F for hours.
Case Studies: Thermal Management in Action
These case studies are based on actual batches I’ve run under controlled conditions, not hypotheticals. The differences are real and reproducible.
Case A: The “Slow Kraut” (Cool Fermentation)
- Conditions: Sauerkraut kept at 62°F (17°C).
- Timeline: 6 weeks.
- Result: Superior crunch and “effervescent” flavor.
Case B: The “Summer Kimchi” (Warm Fermentation)
- Conditions: Kimchi left at 82°F (28°C).
- Timeline: 3 days.
- Result: Mushy and soft texture.
Case C: The “Probiotic Yogurt” (Thermophilic Control)
Milk held steady at 110°F (43°C) using a sous vide circulator for 8 hours. No fluctuation, no guesswork. The result was a firm, mild-tasting yogurt with a clean set — the kind that only happens when thermophilic strains get the exact heat they need without interruption.
Troubleshooting: When Your Ferment is Too Hot or Cold
- My jar is sweating!
- Cause: High humidity. Not a safety issue, but wipe it down.
- The brine is boiling over.
- Cause: Fermentation is too active. Move to a cooler spot.
- There is no activity after 4 days.
- Cause: Likely too cold. Move to a warmer area (70°F+).
The Nara-period toji had no thermometer, no Inkbird, no silicone heat mat. What he had was intimate knowledge of his building — which wall faced north, which floor stayed cool in August. The result was sake of documented complexity that modern craft brewers still try to replicate. You have better tools than he did. Use them precisely. A 3°F drift in either direction doesn’t feel dramatic. Over two weeks, it is the difference between a jar worth eating and one you pour down the drain.
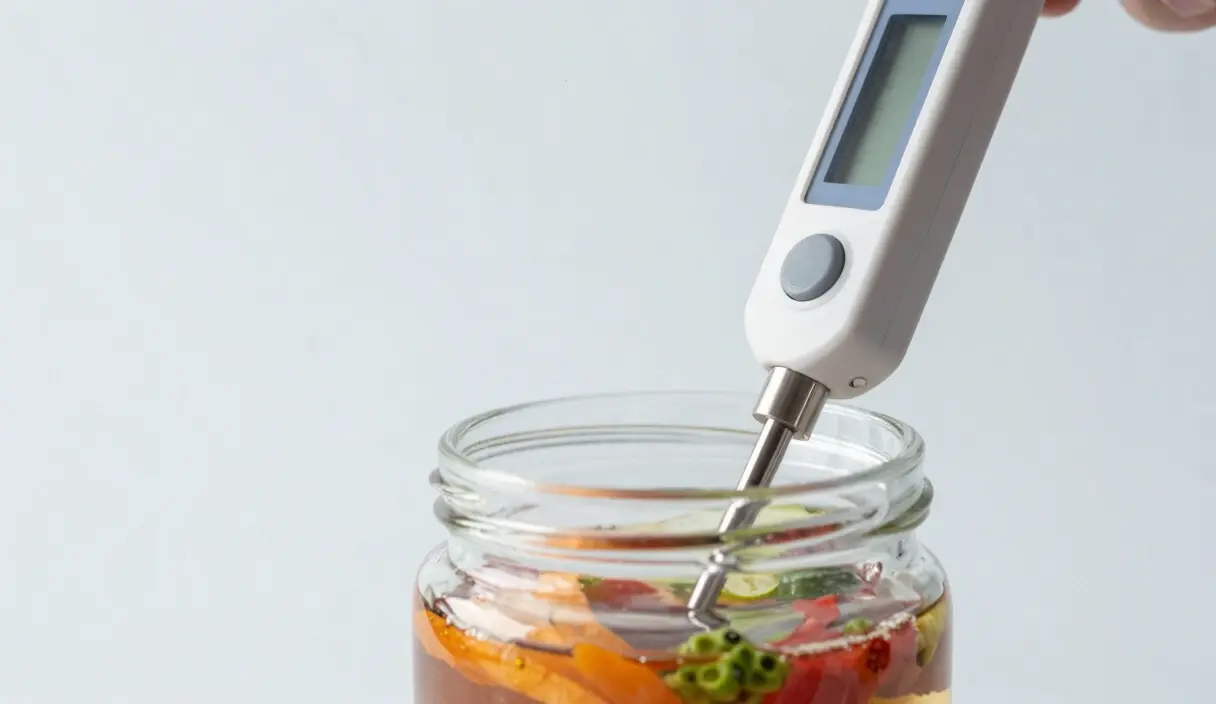
Get one reliable thermometer. Set it at jar level, not eye level. Check it morning and evening for the first week of every new batch until you know exactly how your kitchen behaves.
Temperature controls fermentation speed. Brine controls fermentation safety. See The Science of Brine Ratios for the other half of the equation.
Frequently Asked Questions
Why does my sauerkraut get soft in summer but firm in winter?
Temperature. That’s the whole answer. Above 78°F (26°C), mesophilic LAB work so fast that the lactic acid and CO₂ production outpaces the pectin stabilization in the cell walls — you get acid buildup before the texture-protecting phase is complete. At 62–65°F (17–18°C), the succession slows down, each strain runs its full cycle, and the pectin stays intact long enough to lock in crunch. Same recipe. Different kitchen temperature. Different jar.
Can I ferment in a garage or basement during winter?
Only if you monitor it. A garage in January in Minnesota can drop to 40°F — that’s full bacterial dormancy, not slow fermentation. A Styrofoam cooler with a 25W seedling heat mat and an Inkbird ITC-308 controller creates a stable 68°F chamber regardless of ambient temperature. The Inkbird reads the probe inside the box and cycles the mat on and off to hold your target within ±1°F. That setup costs under $45 and fits in a cabinet.
My jar is bubbling violently after one day. Should I be worried?
Only if your kitchen is above 80°F. Rapid early CO₂ production is normal in the Leuconostoc phase (Phase 1). The problem is when heat accelerates Phase 1 so aggressively that the jar moves into Phase 2 before enough lactic acid has built up to suppress pathogens. If your kitchen is running warm and the brine smells sulfurous rather than tangy, move the jar somewhere cooler immediately. The ferment isn’t lost — slow it down.
What happens if I open the fermentation chamber and let cold air in mid-ferment?
Temperature swings between 55°F and 75°F confuse the microbial succession. The Leuconostoc strains that dominate Phase 1 prefer cooler conditions — a sudden cold snap re-activates them after Lactobacillus has already taken over, producing an inconsistent flavor. Avoid big swings. If you need to access the jar, do it quickly and close up before the chamber temperature drops more than 5°F.
Does humidity inside a fermentation chamber affect the result?
Yes, indirectly. High ambient humidity keeps the brine level stable in open-crock ferments because evaporation slows. Low humidity — under 40% — pulls moisture out of an improperly sealed crock fast enough to expose vegetables to air over a 2-week ferment. Use an airlock or a tight-fitting lid. If you’re using a water-seal crock, top up the moat daily in dry conditions. This is one of the quieter failure modes that catches even experienced fermenters off guard.
Temperature controls fermentation speed. Brine controls fermentation safety. See The Science of Brine Ratios for the other half of the equation.
Related Articles

The Anaerobic Mandate: Why Submergence is Non-Negotiable in Fermentation
Oxygen is the enemy of successful fermentation. We explain the science of anaerobic environments and how to master brine levels for safety.
The Chemistry of Safety: Why pH 4.6 is the Critical Limit in Fermentation
A definitive guide to pH safety in home fermentation. Learn why 4.6 is the critical limit for preventing botulism and how to master acidity.
Water Kefir Grains Care: Troubleshooting Growth and Health
Why are your water kefir grains not growing? We explore the science of grain health, mineral balance, and how to rehabilitate stressed cultures.